Upgrades & Economy
The Upgrades & Economy system manages the roguelite progression between waves. Players earn money by destroying enemies and spend it on random upgrades to improve their ship.
What You Can Customize
This guide covers upgrade system customization:
- Creating and configuring upgrade options
- Setting cost ranges for upgrades
- Setting value ranges for upgrade effects
- Adding new upgrade types
- Configuring upgrade icons and descriptions
- Number of upgrade choices per wave
All configuration happens through the UpgradeManager component.
How The Economy Works
Shape Storm’s economy is simple:
Earning Money:
- Players earn money by destroying enemies
- Each enemy has a “Kill Reward” value (configured in enemy prefabs)
- Money accumulates throughout the run
- Money persists between waves (until game over)
Spending Money:
- Between waves, players see 3 random upgrade options
- Each upgrade has a randomized cost
- Players choose one upgrade and spend money
- Wave continues after purchase
- Unable to afford an upgrade = button disabled
Roguelite System:
- Upgrades only persist for the current run
- When player dies, all upgrades are lost
- New runs start fresh with base stats
- Players start each wave with $25 bonus
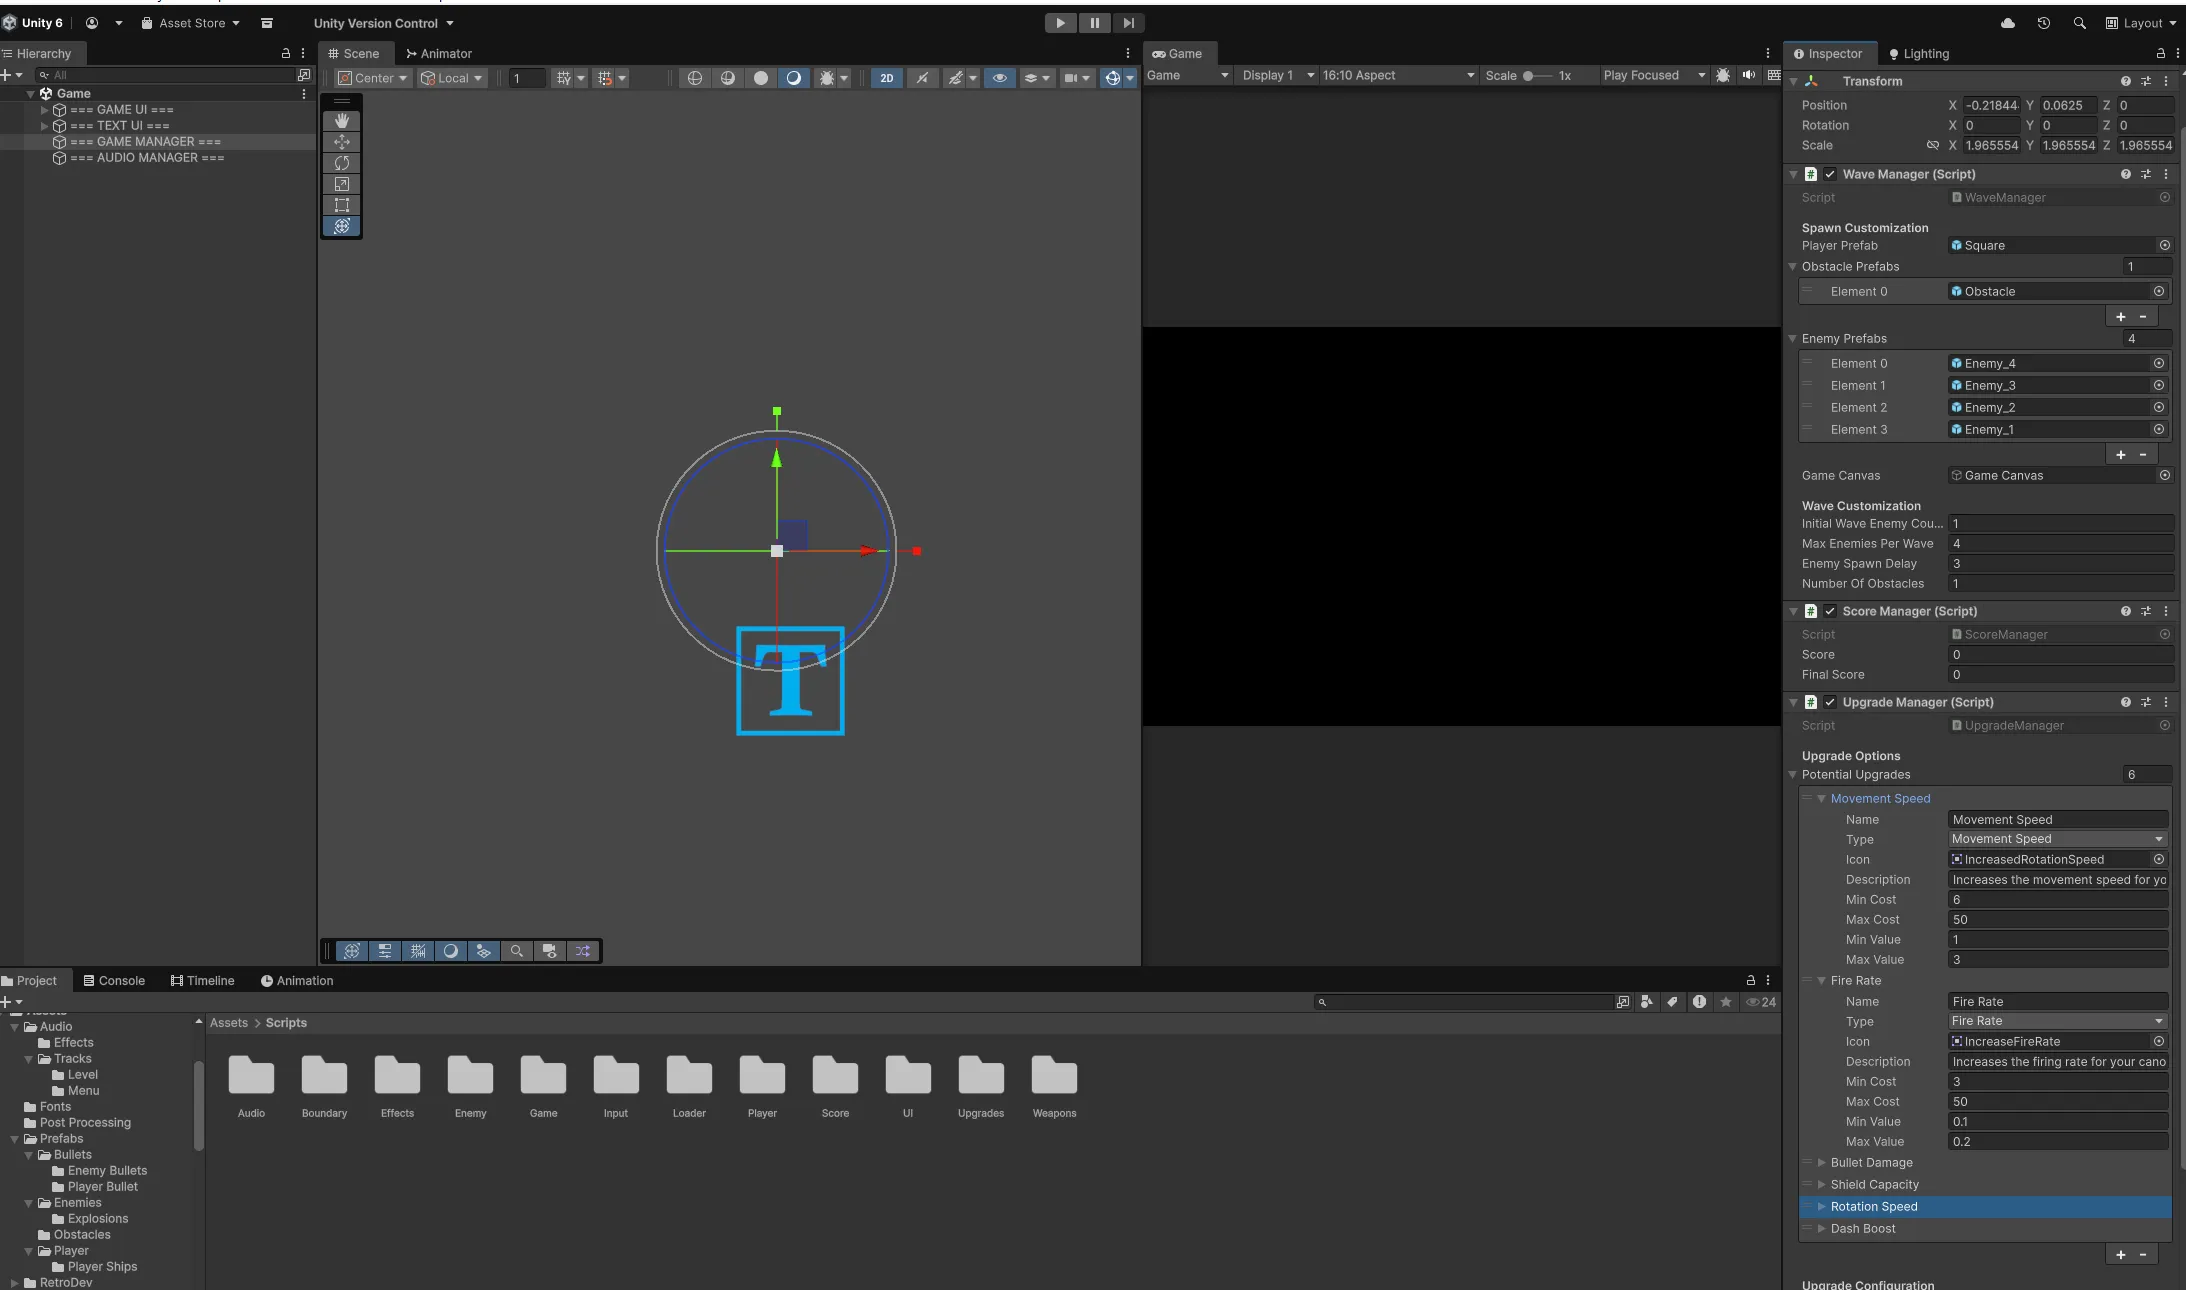
Upgrade Manager Configuration
The UpgradeManager controls all upgrade generation and options.
Location
Game Scene > === GAME MANAGER === > UpgradeManager (Script)
The UpgradeManager component is attached to the game manager object in the Game scene.
Potential Upgrades Array
This array defines all possible upgrades that can appear between waves.
Inspector Fields
Upgrade Options:
- Potential Upgrades: Array of upgrade configurations
Each element in the array contains:
- Name: Display name of the upgrade
- Type: Upgrade type from enum (what stat it affects)
- Icon: Sprite displayed on the upgrade card
- Description: Text explaining what the upgrade does
- Min Cost: Minimum money cost for this upgrade
- Max Cost: Maximum money cost for this upgrade
- Min Value: Minimum stat increase from this upgrade
- Max Value: Maximum stat increase from this upgrade
How Upgrades Are Generated
When the upgrade menu appears:
- System randomly selects from Potential Upgrades array
- For each selection, generates random cost between Min Cost and Max Cost
- Generates random value between Min Value and Max Value
- Displays upgrade card with randomized cost and value
- Player can purchase if they have enough money
This creates variety - the same upgrade type can appear with different costs and values each time.
Available Upgrade Types
The system includes these upgrade types by default:
Movement Speed
- Increases player max speed
- Has upper limit of 10 (configured in Upgrade.cs)
Fire Rate
- Decreases shoot cooldown (faster firing)
- Has lower limit of 0.15 seconds (configured in Upgrade.cs)
Bullet Damage
- Increases damage dealt by player bullets
- No limit
Shield Capacity
- Increases max shield health
- Fully restores shield when purchased
- No limit
Rotation Speed
- Increases player rotation speed
- No limit
Dash Speed
- Increases dash speed boost amount
- No limit
Configuring Existing Upgrades
To modify an existing upgrade’s properties:
Steps
- Navigate to
Game Scene > === GAME MANAGER === > UpgradeManager - Expand the Potential Upgrades array
- Select the upgrade you want to modify
- Adjust the fields:
- Name: Change display text
- Icon: Drag new sprite
- Description: Update description text
- Min Cost / Max Cost: Adjust cost range
- Min Value / Max Value: Adjust power range
The changes affect all future generations of this upgrade.
Cost and Value Ranges
Each upgrade has min/max ranges for cost and value.
Cost Range:
- Controls how expensive the upgrade can be
- Higher costs make upgrades more expensive
- Lower costs make upgrades more affordable
- System randomly picks value between min and max
Value Range:
- Controls how powerful the upgrade can be
- Higher values = stronger upgrades
- Lower values = weaker upgrades
- System randomly picks value between min and max
Example:
- Min Cost: 10, Max Cost: 50 → Upgrade costs between $10-$50
- Min Value: 1, Max Value: 3 → Upgrade increases stat by 1-3
Adding New Upgrades
You can add new upgrade options to the Potential Upgrades array.
Steps to Add Existing Upgrade Type
- Navigate to UpgradeManager component
- Expand Potential Upgrades array
- Increase array size
- Configure new element:
- Set Name (e.g., “Fire Rate II”)
- Set Type (select from dropdown)
- Assign Icon sprite
- Write Description
- Set Min Cost and Max Cost
- Set Min Value and Max Value
This adds a new upgrade option using an existing type.
Creating New Upgrade Types
To add completely new upgrade types (e.g., bullet speed, dash cooldown reduction):
Steps
- Extend the UpgradeType enum:
- Open
Scripts/Upgrades/UpgradeManager.cs - Locate the
UpgradeTypeenum - Add new type to the enum list
- Open
public enum UpgradeType{ MovementSpeed, FireRate, BulletDamage, ShieldCapacity, RotationSpeed, DashSpeed, BulletSpeed, // New type DashCooldown // New type}- Add upgrade logic:
- Open
Scripts/Upgrades/Upgrade.cs - Locate the
BuyUpgrade()method - Add new if statement for your upgrade type
- Open
// if the upgrade type is bullet speedif (upgrade.type == UpgradeManager.UpgradeType.BulletSpeed){    // Deduct the money    ScoreManager.instance.score -= upgrade.Cost;
    // Apply the upgrade    player.GetComponent<Weapon>().bulletSpeed += (int)upgrade.Value;
// Optional: Add limits if (player.GetComponent<Weapon>().bulletSpeed > 20) { player.GetComponent<Weapon>().bulletSpeed = 20; }}- Create upgrade in Inspector:
- Navigate to UpgradeManager component
- Add new element to Potential Upgrades array
- Set Type to your new enum value
- Configure name, icon, description, costs, and values
The new upgrade type is now available in the game.
Upgrade Icons
Each upgrade displays an icon on the upgrade card.
Steps to change icons:
- Import your icon sprite into the project
- Set Texture Type to “Sprite (2D and UI)“
- In UpgradeManager > Potential Upgrades, select the upgrade
- Drag the sprite to the Icon field
Icons should be clear and represent the upgrade visually (e.g., arrow for speed, shield for defense).
Upgrade Descriptions
The description text appears on the upgrade card below the title.
Format:
- Keep descriptions concise (1-2 lines)
- Clearly state what the upgrade does
- Use consistent language across upgrades
Examples:
- “Increases the movement speed for your ship"
- "Increases the firing rate for your cannon"
- "Increases the maximum shield capacity”
Edit descriptions in the UpgradeManager > Potential Upgrades array.
Number of Upgrade Options
Configure how many upgrade cards appear between waves.
Inspector Fields
Upgrade Configuration:
- Number Of Upgrade Options: How many upgrade choices to show
Behavior:
- System generates this many random upgrades
- Each upgrade is independently randomized
- If fewer potential upgrades exist than requested, system caps at array length
- Default is typically 3 options
Location:
The upgrade cards appear in Game Scene > Canvas > WaveComplete > Content
Upgrade Card UI
Each upgrade card displays:
- Upgrade Icon: Visual representation
- Upgrade Name: Title from configuration
- Upgrade Description: Explanation text
- Upgrade Value: How much the stat increases (e.g., “+2 Movement Speed”)
- Upgrade Cost: Money required (e.g., “$35”)
- Buy Button: Purchase the upgrade
The Upgrade.cs script manages each card’s display and purchase logic.
Understanding Upgrade Limits
Some upgrades have hardcoded limits to prevent game-breaking values:
Fire Rate:
- Minimum shoot cooldown: 0.15 seconds
- Prevents infinitely fast shooting
Movement Speed:
- Maximum speed: 10
- Prevents uncontrollable movement
Other Upgrades:
- No limits applied
- Can be upgraded indefinitely
To modify limits, edit the corresponding if statements in Upgrade.cs > BuyUpgrade() method.
Upgrade Application
When a player purchases an upgrade:
- Money Deduction: Cost is subtracted from player’s score
- Stat Application: Upgrade value is added to corresponding stat
- Limit Check: If upgrade has limits, stat is clamped
- Wave Progression: Next wave starts immediately after purchase
Upgrades apply to the player object reference stored from shape selection.
Starting Bonus
Players receive $25 at the start of each wave as a bonus.
Purpose:
- Ensures players can afford early upgrades
- Provides starting capital for first wave completion
- Helps maintain upgrade momentum
Location:
This is set in Upgrade.cs > Start() method:
// Experimental bonus to get the player startedScoreManager.instance.score = 25;To change the starting bonus, modify this value.
Removing Upgrades
To remove an upgrade from the pool:
Steps:
- Navigate to UpgradeManager > Potential Upgrades array
- Find the upgrade to remove
- Either:
- Remove the element from the array, OR
- Decrease array size to exclude it
The upgrade will no longer appear between waves.
Enemy Kill Rewards
Players earn money by destroying enemies. The amount is configured in each enemy prefab.
Location:
Enemy Prefab > Enemy Component > Kill Reward
How it works:
- Each enemy has a Kill Reward value
- When enemy dies, that amount is added to player’s score
- Different enemies can have different rewards
- Rewards accumulate throughout the run
See Combat & Enemies for details on configuring enemy rewards.
Getting Help
Don’t hesitate to reach out if you need help:
- Email: [email protected]
- Social: Find me on GitHub, Twitter, or any of the platforms linked in the header
I built these tools to help developers, so please use me as a resource. Questions, bug reports, feature requests—I want to hear all of it.
Next: Configure Audio & Effects to customize sound and visual effects.