Player & Controls
The Player & Controls system allows you to configure player movement parameters, customize key bindings, adjust shield behavior, and swap player ship visuals - all through the Unity Inspector.
Roguelite Progression System
Shape Storm is a roguelite where each round allows you to upgrade your ship with earned currency. The configurations described in this guide represent base stats - the starting values before any upgrades are applied.
How it works:
- Players choose a ship at the start of each run
- Each ship has unique base stats (speed, health, damage)
- Between waves, players spend money to upgrade their ship
- Upgrades persist for that run only
- New runs start with base stats again
This means you can create multiple ship variants with different starting configurations - some might be fast but fragile, others slow but tanky. Players select their preferred playstyle from the ship selection menu.
What You Can Customize
This guide covers all player-related customization:
- Base stats for different ship variants (speed, health, damage)
- Player movement speed, rotation, and deceleration
- Dash mechanics and cooldown
- Shield health and visual effects
- Key bindings for all controls (supports multiple keys per action)
- Available ships in the selection menu
- Player ship sprites and visual appearance
- Bullet shapes and impact effects
Player Prefabs
Player ships are prefabs that contain all player-related components.
Location
Assets > Prefabs > Player > Player Ships
Each player prefab includes:
- SpriteRenderer: Visual appearance of the ship
- PlayerController: Movement and gameplay logic
- Weapon: Shooting mechanics
- Controls: Input key bindings
- Shield: Child GameObject containing shield configuration
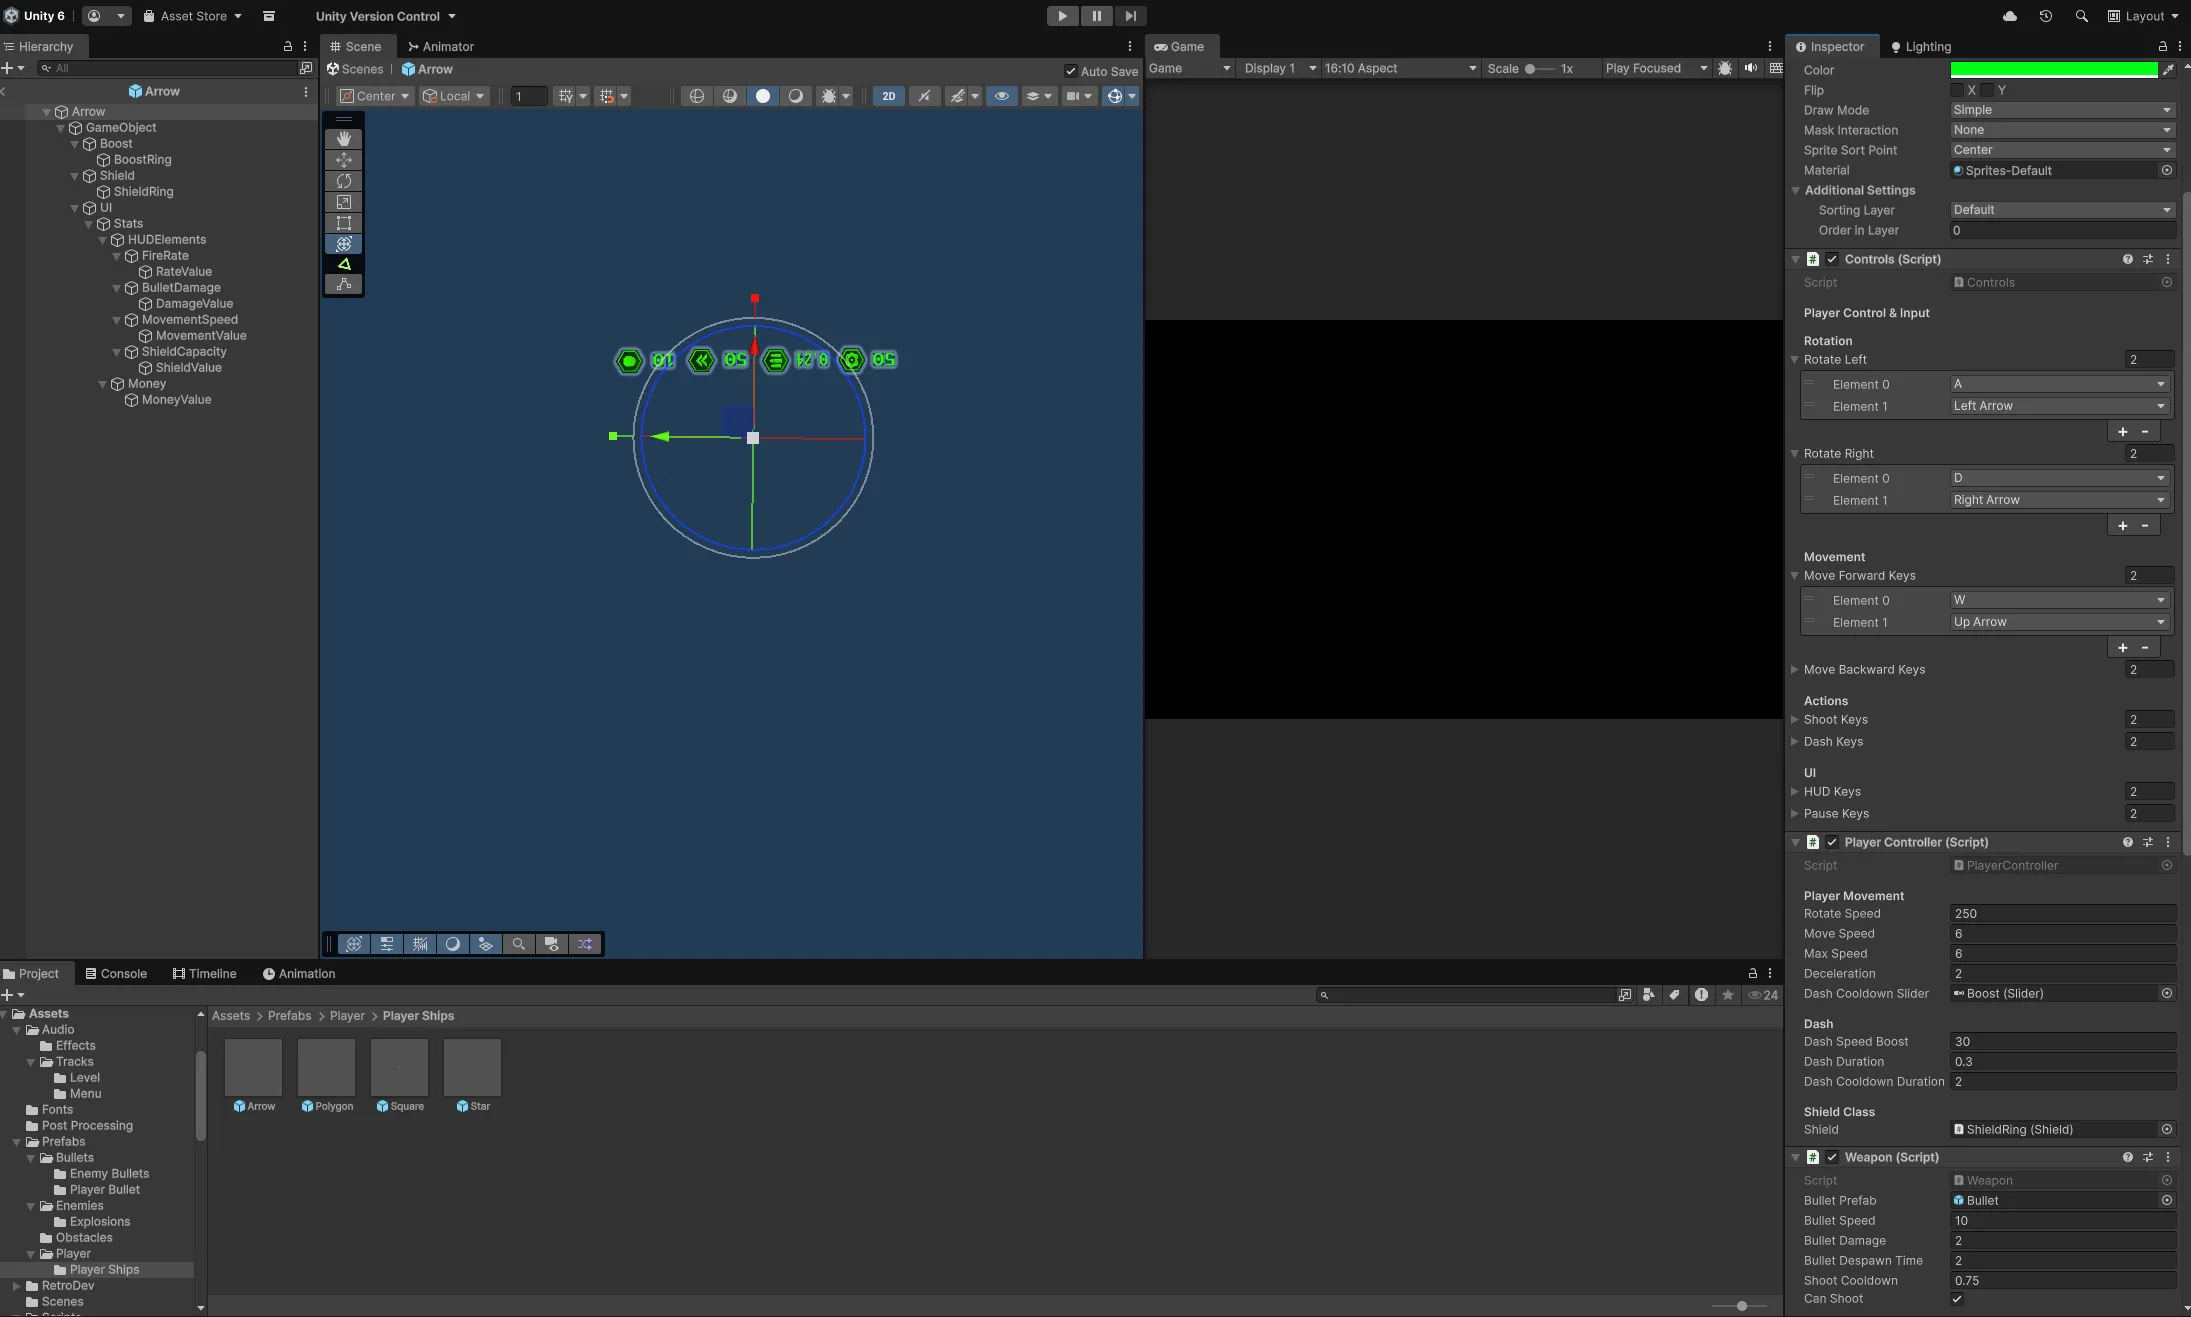
Player Movement Configuration
Configure the base movement stats for each player ship. These values represent starting stats before any in-game upgrades are applied.
Location
Select a player prefab, then view the PlayerController component in the Inspector.
Inspector Fields
Player Movement:
- Rotate Speed: How fast the ship rotates (degrees per second)
- Move Speed: Base movement speed (before upgrades)
- Max Speed: Maximum speed the ship can reach (before upgrades)
- Deceleration: How quickly the ship slows down when no input is given
Movement Behavior
The PlayerController uses acceleration-based movement:
- Pressing forward/backward increases speed gradually
- Releasing controls triggers deceleration
- Speed is clamped to Max Speed
- Ship cannot move outside camera boundaries
Dash Mechanics
Configure the dash ability that lets players quickly dodge enemies.
Inspector Fields
Dash:
- Dash Speed Boost: Additional speed added during dash
- Dash Duration: How long the dash lasts (in seconds)
- Dash Cooldown Duration: Time before dash can be used again (in seconds)
Dash Cooldown Slider
Inspector Fields:
- Dash Cooldown Slider: Reference to the UI slider showing dash cooldown progress
The slider automatically appears during cooldown and fills as the dash recharges.
Shield Configuration
The shield is the player’s health system. When depleted, the game ends. Shield values represent base health before upgrades.
Location
{Player Prefab} > Shield > ShieldRing
The Shield component is not on the player root - it’s on a child GameObject called “ShieldRing”.
Inspector Fields
Player Shield Health:
- Max Shield Health: Maximum base shield health (default: 100)
- Current Shield Health: Starting health (set at runtime)
Player Shield Customization:
- Hit Color: Color when taking damage (default: red)
- Normal Color: Default shield color (default: white)
- Shield Slider: UI slider reference showing shield percentage
Shield Behavior
When the player takes damage:
- Shield health decreases by damage amount
- Shield flashes to the Hit Color briefly
- Shield slider appears showing remaining health
- Slider hides after 0.7 seconds
When shield reaches 0, the game over sequence triggers.
Controls System
Map keyboard inputs to player actions. The Controls component supports multiple keys per action.
Location
Assets > Prefabs > Player > Player Ships > Controls (Script)
The Controls script is attached to each player prefab.
Inspector Fields
Rotation:
- Rotate Left: Array of keys to rotate left (default: A)
- Rotate Right: Array of keys to rotate right (default: D)
Movement:
- Move Forward Keys: Array of keys to move forward (default: W)
- Move Backward Keys: Array of keys to move backward (default: S)
Actions:
- Shoot Keys: Array of keys to shoot (default: Space)
- Dash Keys: Array of keys to dash (default: Left Shift)
UI:
- HUD Keys: Array of keys to show HUD (default: Q)
- Pause Keys: Array of keys to pause (default: Tab)
Adding Multiple Keys
Each action supports multiple key bindings. To add alternate controls:
- Expand the key array (e.g., “Shoot Keys”)
- Increase the array size
- Add additional KeyCodes to the array
Example: Allow both Space and Left Mouse Button for shooting:
- Shoot Keys: Size = 2
- Element 0: Space
- Element 1: Mouse0
Players can then use either key to perform the action.
Controller Support
Shape Storm automatically detects connected controllers and switches to analog stick input.
Controller mapping:
- Left Analog Stick: Movement (forward/backward)
- Right Analog Stick: Rotation (left/right)
- Controller buttons: Configured through Unity’s Input Manager
When a controller is detected, the game uses Input.GetAxis("Vertical") and Input.GetAxis("Horizontal") instead of keyboard keys.
Player Visual Customization
Swap player ship sprites to completely change appearance.
Changing Player Sprite
Steps:
- Navigate to
Assets > Prefabs > Player > Player Ships - Select the player prefab you want to customize
- Locate the SpriteRenderer component
- Import your custom ship sprite
- Set the sprite’s Texture Type to “Sprite (2D and UI)“
- Drag your sprite into the Sprite field of the SpriteRenderer
The ship’s visual appearance updates immediately.
Player Color
The player color is set dynamically at runtime based on player customization choices in the menu.
Inspector Field:
- Player Color: Static color value set from the customization menu
This is managed automatically and doesn’t need manual configuration.
Bullet Customization
Customize the appearance and effects of player bullets.
Bullet Prefab Location
Assets > Prefabs > Bullets > Player Bullet
Bullet Impact Location
Assets > Prefabs > Bullets > Player Bullet Impact
Changing Bullet Appearance
Steps:
- Open the Player Bullet prefab
- Locate the SpriteRenderer component
- Replace the sprite with your custom bullet shape
- Adjust size, color, and rotation as needed
Changing Bullet Impact
The impact effect plays when bullets hit enemies or obstacles.
Steps:
- Open the Player Bullet Impact prefab
- Adjust the Particle System properties:
- Color
- Size
- Lifetime
- Emission rate
- Shape
Managing Available Ships
Shape Storm allows players to choose from multiple ship variants at the start of each run. You control which ships appear in the selection menu through the ShapeSelect component.
Location
Menu Scene > MenuCanvas > ShapeSelect GameObject
The ShapeSelect component contains a Shape Prefabs array that determines which ships are available.
Inspector Fields
Shape Prefabs Array:
- Array of player ship prefabs available for selection
- Ships appear in the selection menu in array order
- Add/remove ships by modifying this array
Adding New Ships to Selection Menu
Steps:
- Navigate to
Menu Scene > MenuCanvas > ShapeSelect GameObject - In the Inspector, locate the ShapeSelect component
- Expand the Shape Prefabs array
- Increase the array size
- Drag your new player prefab into the new slot
The ship will now appear as a selectable option in the shape selection screen.
Removing Ships from Selection Menu
Steps:
- Navigate to the ShapeSelect component
- Expand the Shape Prefabs array
- Find the ship you want to remove
- Either:
- Remove the element from the array, OR
- Decrease the array size to exclude it
The ship will no longer appear in the selection menu.
Creating Ship Variants with Different Stats
Each ship prefab can have unique base stats. To create a new variant:
Steps:
-
Duplicate existing prefab:
- Navigate to
Assets > Prefabs > Player > Player Ships - Right-click a player prefab → Duplicate
- Rename it (e.g., “PlayerShip_Fast”)
- Navigate to
-
Customize stats:
- Open the prefab
- Adjust PlayerController movement values
- Modify Shield max health (Shield > ShieldRing)
- Configure dash parameters
-
Customize visuals:
- Replace the SpriteRenderer sprite
- Adjust shield visual (ShieldRing sprite/color)
- Update bullet prefab reference if needed
-
Add to selection menu:
- Open Menu Scene
- Navigate to MenuCanvas > ShapeSelect
- Add the new prefab to the Shape Prefabs array
Players can now select this ship variant from the shape selection menu.
Controller Detection
The ControllerDetector automatically detects when a controller is connected. When detected:
- Movement switches from WASD to analog sticks
- Loading screen hints show controller button names
- Control UI displays controller icons
Getting Help
Don’t hesitate to reach out if you need help:
- Email: [email protected]
- Social: Find me on GitHub, Twitter, or any of the platforms linked in the header
I built these tools to help developers, so please use me as a resource. Questions, bug reports, feature requests—I want to hear all of it.
Next: Configure Combat & Enemies to adjust weapons and enemy behavior.